first you should know that you will install some dependencise to be able to open the project
- installing node.js environment
- installing VSCode
- open the portfolio by VSCode to edit some of code and see the portfolio on chrome browser
- change portfolio data to your personal data, and it's recommended to knowing javascript arrays and objects to edit easily
- add appropriate images instead of placeholders
- enable the contact form for sending mails
- deploying the portfolio on hosting provider like vercel for example to be accessble everywhere
- testing the contact form and other things
Folder Structure - files/folders that should modified
├── public                          # [Folder] images and cv file
│   ├── images                      # [Folder] Images
│   │   ├── projects                # [File] Projects image
│   │   ├── tools                   # [File] Tools image
│   │   ├── about.png               # [File] About image
│   │   └── hero.png                # [File] Hero image
│   └── cv.pdf                      # [File] CV PDF file
├── src                             # [Folder] Source Folder (main folder)
│   ├── _actions                    # [Folder] Actions (specifically for form action)
│   ├── app                         # [Folder] App router
│   │   └── favicon.ico             # [File] favicon image
│   ├── components                  # [Folder] Components
│   ├── data                        # [Folder] Data (portfolio data) modify all files inside
│   │   ├── about.ts                # [File] About section data
│   │   ├── app.ts                  # [File] App data (title, description, keywords)
│   │   ├── contact.ts              # [File] Contact section data
│   │   ├── experience.ts           # [File] Experience section data
│   │   ├── global.ts               # [File] Global data (social links, theme configuration)
│   │   ├── home.ts                 # [File] Home section data
│   │   ├── projects.ts             # [File] Projects section data
│   │   └── services.ts             # [File] Services section data
│   ├── hooks                       # [Folder] Custom hooks
│   ├── libs                        # [Folder] Libs for utility functions
│   ├── shared                      # [Folder] Shared types or colors
│   └── styles.module.css           # [Folder] CSS styles module
├── .env                            # [File] Environment variables file
├── .eslintrc                       # [File] Eslintrc file
├── .gitignore                      # [File] Git ignore file
├── components.json                 # [File] Components description
├── next-env.d.ts                   # [File] Environment variables types
├── next.config.mjs                 # [File] Next.js configuration
├── package-lock.json               # [File] NPM lock file
├── package.json                    # [File] NPM lock file
├── postcss.config.mjs              # [File] Postcss configuration
├── tailwind.config.ts              # [File] Tailwind configuration
└── tsconfig.ts                     # [File] Project readme
- install node.js from here
- install VScode text editor from here
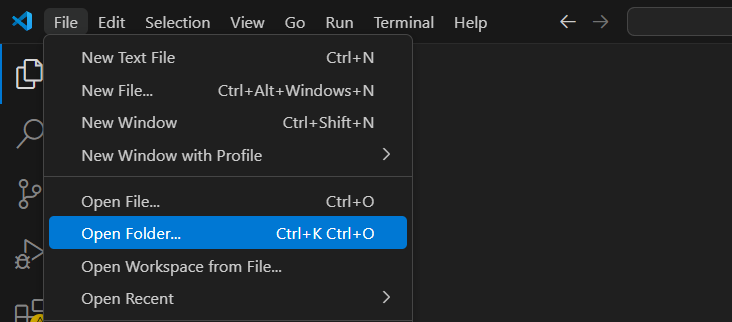
- open VSCode and open the portfolio project folder Portfolio folder that contains of public, src, .env, etc... files
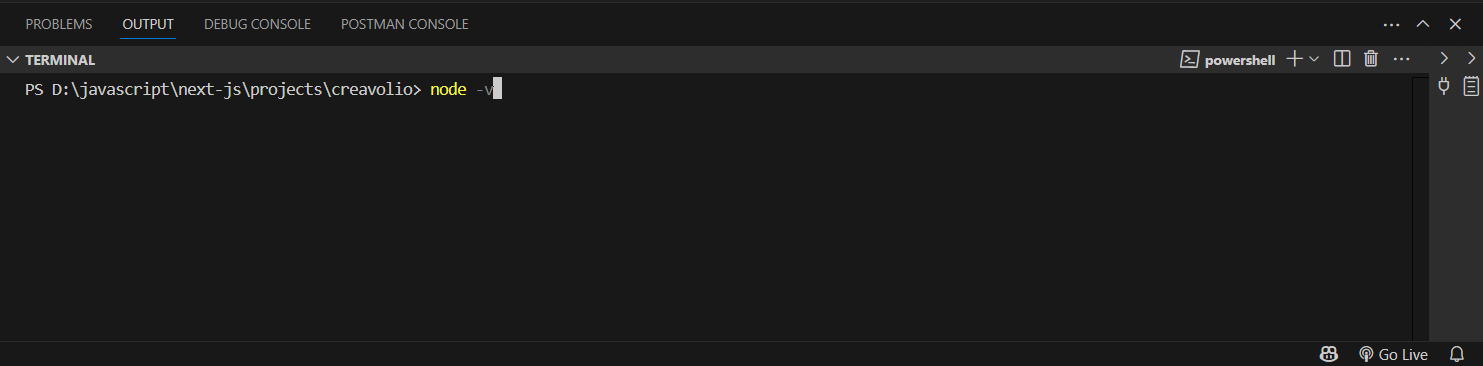
- press CTRL + J to open the terminal and then select output
- write: node -v to show version of nodejs and sure you installed correctly otherwise there is problem about installing
- write: npm i to install node_modules folder
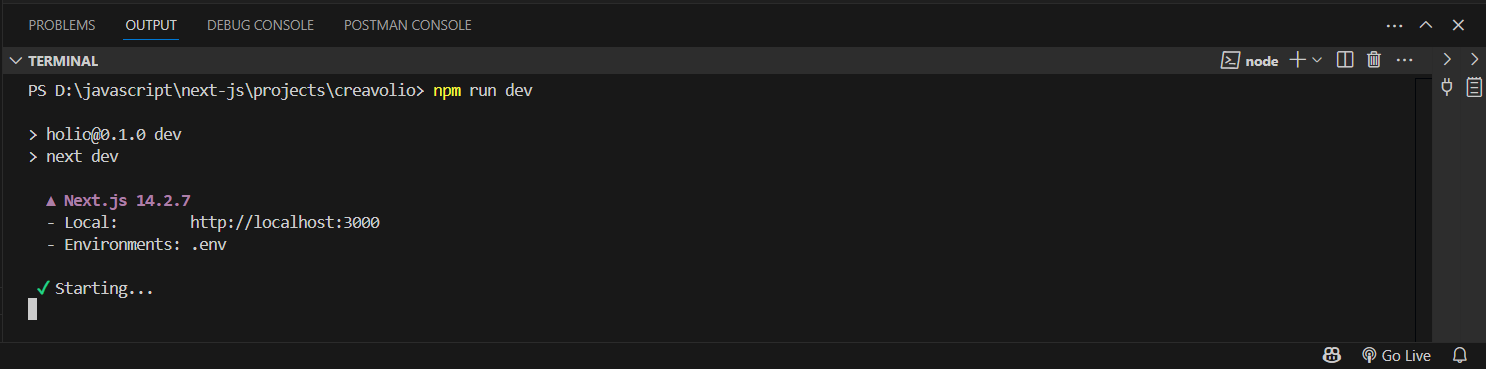
- write: npm run dev to open the project in your computer as a server
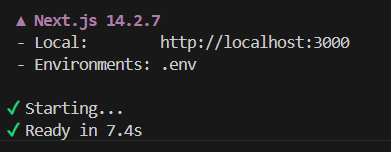
- you will find http://localhost:3000 in the output just press Ctrl + click on http://localhost:3000 to open the link on browser
- refresh the page in first time because there are issues related by development mode sometimes in next.js
- now you can customize the portfolio and show your customization on the web page without reload the page
- you should know that before start: all editing will be on data folder for portfolio data and public folder for images and cv file and .env file for sending mails
- try to learn from mockup images and data to understant how to modify the portfolio to fit you and your needs


if you want edit template easily just you need simple knowledage of js variables,arrays and objects to edit the portfolio and it's really simple and here the explanation:
javascript variables
- Variables are Containers for Storing Data
- example
const name = "Daniel Mark" - there are data type and we will use:
-
string for texts, example
const about_me = "I Love Programming ...." -
number, example
const years_experience = 9 -
boolean values for true or false, example
const is_available = true
javascript objects
- In real life, objects are things like: houses, cars, people, animals, or any other subjects.
-
example
const hero = { name: "Daniel Mark", job: "Web Developer",
                  image: "/images/hero.png" }
javascript arrays
-
An array is a special variable, which can hold more than one
value and wrapped by [ ] for example:
["john", "daniel", "mark"] -
example:
const skills = ["graphic design", "programming", "anaysis"] -
and we can create array of objects:
[ {skill: "a", value: 90}, {skill: "b", value: 78} ]
data folder
- open data folder and you will find all sectinos of portfolio
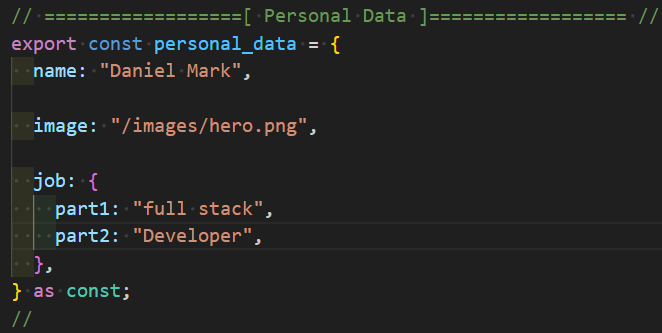
- when you change the data of any section to add your personal data for example you will notice thar there are variabels and block of properties that describes the section
- the method of changing data is same
- you can add or remove and edit , you have the full control
- you will just replace some of texts and images paths to fit yours needs
- do not change name of constants, just you want to modify the data
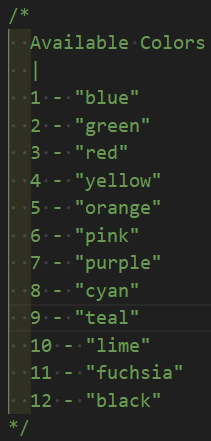
- for icons you will find the available icons that easily used and commented before every block requires icons just copy and paste it in the correct value place:
- blue
- green
- red
- yellow
- orange
- pink
- purple
- cyan
- teal
- lime
- fuchsia
- black
- for colors you will find it before every block requires colors
- open public folder and then images and there are projects, tools, hero.png
- it's not required to add images has the same dimensions like placholders images
- when you want to add your image or any image you should add the image on images folder and then in data file at the property that requires the image, just add the source of image for example "/images/hero.png"
- add appropriate images
- replace that images by your images
- remove the dummy cv.pdf file and replace it by your actual cv file in public folder directly
- add your project's images in images/projects and in data/projects add the images source for example /images/projects/project1.png
- add your tools images in images/tools and in data/projects add the images source for example /images/tools/figma.png
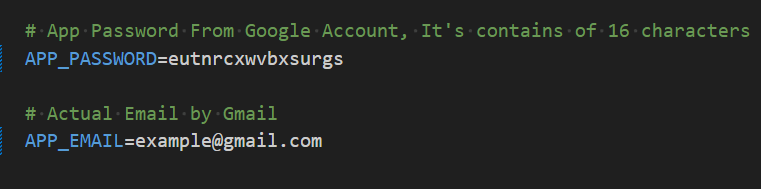
- open .env file
- create app password from google just go to google, and select privacy section and search for app password and create one and then copy it to add to APP_PASSWORD and the app password contains of 16 characters and don't forget to remove spaces between password
- add your actual email in EMAIL and look at the example below
- you can test it to send to your self
If you face any problem or have confusion about something or have any sugesstion please contact me any time contact me
- know more about VSCode by watching some videos, how to use, how to add extenstions that make your life easier, etc...
- don't change const variables to another name that exists in data folder's files about.ts, projects.ts, etc..., just edit the values
- focus when editing
- if you face any confusion you can know more about javascript variables & datatypes, arrays ,objects
- choose appropriate images to add
- hero's image must be .png, so if you have an jpg image you can remove image's background by a lot of tools
- about's image maybe .png or jpg it's up to you
- you can get used tools images from svg repo and that i used in portfolio
- add service's image describes the provided service and i used freepik
- add your project's screen shots images
- know more about deployment by watching some videos